Stairs, Curbs, and Uneven Terrain: Real-World Crutch Skills
Most patients learn to use crutches in a hospital corridor or a PT clinic. Both are flat, predictable, well-lit, and free of obstacles. The real world is none of those things. Within the first 24 hours of being home, almost every patient encounters a set of three steps to the front door, a curb at the parking lot, a slightly uneven sidewalk, and a doorway with a threshold lip. That gap, between where you learned to use crutches and where you actually have to use them, is where most preventable falls happen.
This guide covers the techniques PTs teach for stairs, curbs, and uneven terrain, plus the real-world adaptations patients learn the hard way during recovery. It's not a substitute for in-person PT instruction. If your surgeon or hospital sent you home without a stair-walking lesson, ask for one before your first attempt. It does cover the situations PTs don't always have time to walk through, and it's a reference patients (and their family members) can come back to before any new outdoor outing.
Stairs — The Single Most Important Skill
Stairs are the highest-risk activity for crutch users. They're also unavoidable in most homes and most public spaces. The PT-taught technique is straightforward, but it's the kind of thing that has to be practiced before it becomes muscle memory. The worst time to learn it is the first time you really need it.
The simple rule: "up with the good, down with the bad."
This is the most repeated phrase in stair-walking instruction. Repeated for a reason. Going UP, lead with your good (unaffected) leg. Going DOWN, lead with the operated leg and the crutches. The mnemonic PTs teach is "the good go up to heaven, the bad go down to hell." It sticks because it's slightly dark and slightly memorable, and patients who learn it during PT remember it weeks later when they're standing at the top of a staircase trying to figure out what to do next.
Going up stairs (with a handrail).
Hold the handrail with one hand. Tuck both crutches under the opposite arm, horizontally, against your side, with the cuffs facing forward and the tips back. Step UP with your unaffected leg first. Then bring your operated leg up to meet it. Then bring the crutches up to the same step. One step at a time, like climbing a ladder. Don't skip steps. Don't rush. The handrail does most of the work. Lean on it more than you think you should.
Going down stairs (with a handrail).
Hold the handrail with one hand. Tuck both crutches under the opposite arm. Lower the crutches to the next step DOWN. Then step DOWN with your operated leg first (yes, with the bad leg, it's counterintuitive but it's correct). Then bring your unaffected leg down to meet it. The crutches and the operated leg move together. The unaffected leg follows. The handrail is your safety net. Grip it firmly enough that if you slipped, the rail would catch you.
Going up stairs (without a handrail).
This is harder and should be avoided when a handrail is available, even if it means taking a longer route. If there's no handrail: place both crutches on the step you're currently on. Plant the tips firmly. Step UP with your unaffected leg. Then bring the operated leg and the crutches up to the same step in one coordinated motion, weight on the crutches. One step at a time. Slowly. This technique requires upper-body strength most patients underestimate. If you don't feel confident, get help.
Going down stairs (without a handrail).
This is the highest-risk variation and the one most likely to cause a serious fall. If you can avoid it, do. If you can't: place both crutches firmly on the step BELOW you. Step DOWN with your operated leg first, leaning your weight onto the crutches as you go. Then bring your unaffected leg down. Pause. Repeat. Slowly. If at any moment you feel unsteady, sit down on the step and scoot down on your bottom. There is no version of this where pushing through unsteadiness is the right choice.
The bottom-scoot technique.
This is universally underrated. If a staircase is long, narrow, dimly lit, or you're tired, sitting on the top step and scooting down on your bottom is a perfectly acceptable PT-approved technique. Lay your crutches across your lap or beside you. Use your hands and your unaffected leg to lower yourself one step at a time. It's slower, but it eliminates the fall risk almost entirely. Many patients use the bottom-scoot for the first 1 to 2 weeks post-op and transition to the standing technique once they have the strength and balance for it.
Stairs — The Mistakes to Avoid
- Carrying anything in your hands while doing stairs. Anything. A coffee, a phone, a bag, a glass of water. Both hands need to be free for crutches and handrail.
- Skipping steps to go faster. Stairs are not the place to be efficient.
- Doing stairs late at night, after fatigue, or while still on opioid pain medication. The last 60 seconds of the day is when most stair falls happen.
- Doing stairs in socks on a polished wooden staircase. Wear shoes with grip, on both feet.
- Trusting a wobbly handrail. Test it before committing to it. If it gives, use the wall and crutches instead.
- Going down stairs faster than going up. Down is the harder direction. Down is also where the worst falls happen.
- Doing stairs alone in the first 1 to 2 weeks. Have someone in the house, even if they're not on the stairs with you.
Curbs — The Smaller, Sneakier Version of Stairs
Curbs feel like a smaller, easier version of stairs. They aren't. The lack of a handrail, the unpredictable height (some curbs are 4 inches, some are 8, some have a slope), and the fact that they often appear in the middle of busy parking lots and crosswalks make them their own category of risk. The technique is the same as stairs without a handrail ("up with the good, down with the bad") but the surrounding conditions are usually worse.
Going up a curb.
Approach the curb straight on, perpendicular to the curb edge. Plant both crutches on top of the curb, tips firm and well behind your body. Step UP with your unaffected leg. Bring the operated leg and the crutches up together. Pause. Move on.
Going down a curb.
Approach the curb straight on. Place the crutches DOWN onto the lower surface, tips firm and slightly forward. Step DOWN with your operated leg first, weight on the crutches. Then bring the unaffected leg down. Don't step off the curb leading with the unaffected leg. The drop forces the operated leg to absorb the impact, and that's often the moment something goes wrong.
When in doubt, find the ramp.
Most public spaces have curb cuts and accessible ramps within 50 to 100 feet of any curb. Take the longer path. The few extra steps are always worth less risk than navigating an awkward curb in a parking lot. This is one of the most underused practical adaptations during recovery. Patients who get used to scanning for the ramp first do not regret it.
Doorways and Thresholds
The half-inch lip at the bottom of most exterior doorways is a deceptively common cause of crutch trips. The crutch tip catches on the lip, the crutch swings unexpectedly, and the patient stumbles. The technique is simple. Step OVER the threshold with your unaffected leg first, plant it firmly on the other side, then bring the crutches and operated leg over together. Don't plant a crutch on the threshold itself. Don't try to swing both crutches and the operated leg over in one motion.
Heavy doors are their own challenge. Most patients learn to position one crutch under the door (acting as a doorstop while you walk through), or to ask for help in public buildings. Many businesses with heavy non-automatic doors will install temporary doorstops if you ask. Most patients adopt a routine of looking for the accessible door (often labeled with a wheelchair symbol) before approaching the main entrance. These doors usually have automatic openers and are dramatically easier on crutches.
Uneven Terrain — What's Actually Hard and What Isn't
Grass.
Easier than it looks. Most lawns have firm enough soil that crutch tips don't sink in noticeably. Wet grass is the exception. The tips can slide unexpectedly. Wet grass on a slope is genuinely dangerous and should be avoided. Dry, mowed grass on level ground is fine for most patients.
Dirt and gravel.
Loose surfaces shift under crutch tips. Walk slower. Plant the tips with more deliberate pressure than on hard surfaces. Avoid loose gravel on a slope. It's one of the highest-fall-risk surfaces during recovery. If you have to cross gravel to get to the front door of a destination, look for the alternate path or accept that you may need help.
Sand.
Hard. Crutch tips sink. The tips don't plant. Forward progress is slow and exhausting. If you have to cross sand, take small steps and accept the slower pace. For longer beach access, beach wheelchairs (covered in the summer travel post) are the better solution.
Wet pavement and rain.
The standard crutch tip grips wet concrete adequately but not perfectly. Walk slower in rain. Avoid puddles. The surface under a puddle is unpredictable and the crutch tip planting motion is harder to control. Painted lines on parking-lot pavement become surprisingly slippery when wet. Watch for them.
Snow and ice.
Genuinely dangerous. Standard crutch tips do not grip ice well. If you must crutch on snow or ice, ice-grip crutch tip attachments (sometimes called "ice tips" or "snow pads") are inexpensive and dramatically improve traction. Even with them, walk slower than you think necessary. If you have a long winter recovery scheduled, plan to minimize outdoor crutch use entirely. Ice is the surface where serious crutch falls happen most often.
Polished tile floors and slick lobbies.
Hospital lobbies, hotel lobbies, and many office buildings have polished tile or marble floors that look fine but are slick under standard crutch tips. Watch for these especially when wet (rain, fresh mopping). When you're on a slick floor, walk slower and shorten your stride.
Crowded sidewalks and busy stores.
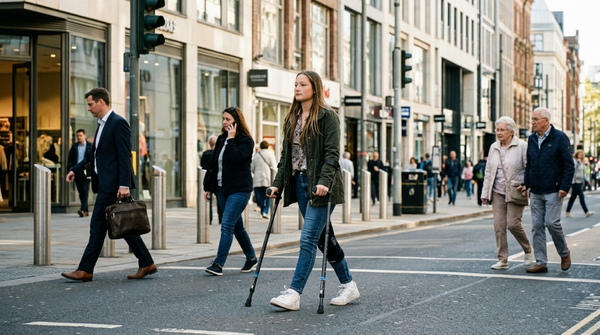
People walking next to you tend to misjudge how much space your crutches need. The base of a crutch swing is wider than a normal walking gait, and someone passing too close can clip a crutch. The defensive technique: keep one crutch on the building/wall side and use the other on the open side, so passers-by are clipping the open crutch (which has more space to swing) rather than the wall-side crutch. In dense crowds, slow down and let other people move around you.
Public Bathrooms, Restaurants, and Stores
Restaurants and cafes.
Call ahead and ask for a table near the door, on the ground floor, away from the bar crowd. Most restaurants will accommodate without hesitation. The walk from the door to a back-corner booth is one of the more tiring real-world crutch routes. Ask for less.
Public bathrooms.
Use the accessible stall when available. Wider stall, often with grab bars, raised toilet seat, and more room to set crutches against a wall without blocking the door. The accessible stall is for any patron with a mobility need. You don't need a permit to use it.
Grocery stores.
Use a motorized cart or rest a hand on a regular shopping cart for stability. Crutching with a hand-basket is harder than people expect and tires the upper body fast. Let store employees help you reach high shelves. Most grocery store baggers will help you out to the car if you ask at checkout.
Parking lots.
Choose handicap parking when you can. The proximity matters more than people give it credit for. If you don't have a temporary handicap placard yet, ask your surgeon's office for one. Most surgeons will sign the paperwork at any post-op visit, and the placard is good for the duration of recovery. Avoid crossing through the diagonal cross-traffic of large parking lots. Take the longer route around the perimeter where pedestrian paths are clearer.
The Real-World Routine That Reduces Fall Risk
Plan the route.
Before any new outing, think through the route. Where's the parking? Are there stairs at the entrance? Is there an accessible entry? Is the path from the parking lot to the door uneven? Is there a curb to step down? The 30 seconds of planning before you leave the house is the single highest-value fall-prevention investment you can make.
Go in the alert window.
Like with bathing, real-world outings should happen in the part of the day when you're most alert. Mid-morning, after pain medication has had a chance to take effect but before fatigue builds. Don't do new outings late at night or right after taking opioid pain medication.
Bring a buddy.
In the first 1 to 2 weeks, bring someone with you for any outing involving stairs or unfamiliar terrain. They don't have to do anything except be present. Their presence is what makes a stumble into a recoverable moment instead of a fall.
Build up gradually.
First week: short outings on flat surfaces close to home. Second week: add a curb or two, longer flat walks. Third week: a short flight of stairs with a handrail, supervised. Fourth week: longer outings with more terrain variation. Patients who scale up gradually have dramatically fewer falls than patients who try to resume normal activity in week one.
Trust your gut.
If a particular obstacle looks hard, find another route. If you feel unsteady, sit down and rest. If a stair without a handrail looks risky, do the bottom-scoot. There is no scenario where pushing through a worried-looking situation is the correct choice. Patients who fall during recovery are almost always the ones who overrode a quiet voice telling them not to do the thing they were about to do.
What to Avoid
- Stairs without a handrail when one is available within walking distance
- Stairs while carrying anything in your hands
- Stairs in socks on a hardwood staircase
- Curbs in the middle of crowded parking lots when a curb cut is nearby
- Uneven terrain in the rain or after dark when surface conditions are hard to read
- Snow and ice without ice-grip crutch tips
- Crutching with a coffee, a phone, or anything else that uses a hand
- New outings late in the day, while fatigued, or while still on opioid pain medication
- Stairs alone in the first 1 to 2 weeks
Why the Crutches You Use Matter on Real-World Surfaces
Real-world crutch use is dramatically more demanding on the upper body than the predictable hospital-corridor environment where most patients first learn to walk on crutches. Stairs, curbs, and uneven terrain all generate higher peak forces and more variable load patterns than flat indoor walking. Patients on conventional crutches often hit a wall on real-world activities sooner than they hit a wall at home, because the cumulative upper-body load that conventional crutches transmit reaches its limit faster on demanding surfaces.
This is the cumulative-load problem the In-Motion crutch was designed for. By absorbing impact at the ground strike and reducing the per-step force spike to the wrist, hand, and shoulder, it preserves more of the upper-body capacity needed for stairs, longer outings, and uneven terrain. Patients regularly describe being able to do real-world activities they couldn't have done on conventional crutches without arriving home exhausted.
Shop crutches engineered to reduce upper-body fatigue →
The Bottom Line
Most patients learn crutches in a flat hallway and have to use them in a world that isn't flat. The technique is learnable. "Good goes up, bad goes down." Use the handrail. Take the ramp instead of the curb. Avoid stairs late at night. Build up gradually. Bring a buddy in the first two weeks. When in doubt, sit down and scoot.
Patients who learn the techniques and respect the conditions get through recovery without serious falls. Patients who get cocky in week three are the ones who end up back at the surgeon's office. There is no rush. The slow, technique-correct version of any movement is also the safe one.
Frequently Asked Questions
How do I do stairs without a handrail?
Avoid them when you can. When you can't: place both crutches on the step you're currently on, step up with the unaffected leg, then bring the operated leg and the crutches up together. Going down: place crutches on the step BELOW, step down with the operated leg first, then bring the unaffected leg down. Slowly. The bottom-scoot technique (sitting on a step and scooting down on your bottom) is always an acceptable alternative.
When can I use stairs after surgery?
It depends on the procedure and your surgeon's clearance, but most patients are cleared for supervised stair-walking from day one. The first attempt should be in PT or with explicit family supervision, not solo. Patients with multi-week non-weight-bearing protocols usually do bottom-scoot only for the first 1 to 2 weeks and transition to the standing technique once they have the strength and balance.
Are ice tips for crutches a real thing?
Yes. Ice-grip crutch tip attachments (sometimes sold as "ice tips" or "snow pads") are widely available, inexpensive, and dramatically improve traction on ice and packed snow. If you have a winter recovery scheduled and have to crutch outdoors, get them. Even with them, walk slower than you think you should.
Can I use a knee scooter instead of crutches for outdoor activities?
For some patients and some surfaces, yes, with surgeon clearance. Knee scooters are easier on flat outdoor pavement than crutches, but they're harder on uneven terrain, stairs, and curbs. Many patients use both. A knee scooter for longer outdoor walks and crutches for indoor activities and tight spaces. Talk to your surgeon about which is appropriate for your specific recovery.
How do I get a temporary handicap parking placard?
Most surgeons will sign the paperwork at any post-op visit if you ask. The form is usually short and varies by state. Your local DMV website has specific instructions. Once signed, the placard is typically issued the same day or within a few business days. The placard is good for the duration of your recovery (often 6 months) and the parking proximity meaningfully reduces fall risk by shortening the walk to and from the car.
What do I do if I fall on my crutches?
Stay calm. Don't try to stand up immediately. Sit on the floor and assess. Are you in pain? Is anything bleeding? Did you hit your head? If you're in significant pain or hit your head, call your surgeon's office or 911. If you're shaken but uninjured, sit until you've caught your breath, then call someone to help you get up safely. Document the fall (when, where, what surface, what happened) and tell your surgeon at your next appointment, even if you feel fine. Some recovery setbacks from a fall don't show up for days.
Related Recovery Guides